|
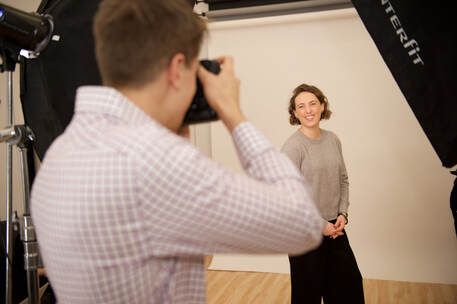
By the end of this article, you'll know how to take a professional headshot with a cell phone. Here's some of what's covered:
Ready to get started? Scroll down to begin. Don't want to be bothered with lighting and other details? We offer "Virtual Headshot" packages, where we take your photo over the internet and digitally retouch it to make the background and lighting professional. There are three main things to keep track of when taking a professional headshot with an iPhone:
Part 1 of 3 |
|
"The Setup"
Step 3 of 3: Ensure the Lighting is Great
Lighting is the secret sauce to make headshots look professional.
If you don't want people to know you took your headshot on your smartphone, you should spend a few extra minutes to ensure the lighting is good.
Can you see the problem with the lighting in the photo below?
If you don't want people to know you took your headshot on your smartphone, you should spend a few extra minutes to ensure the lighting is good.
Can you see the problem with the lighting in the photo below?
If you're not careful, you can get extremely dark shadows under your eyes when the lighting is not coming from the right angle!
The best light comes from in front and slightly above. It should come from a large source so it's very soft and doesn't create harsh shadows on your face.
For Great Lighting, Stand in Front of a Window:
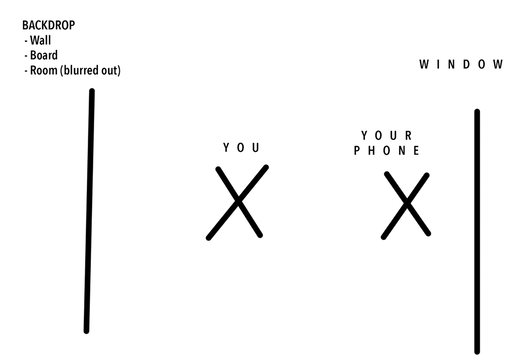
The best way to get good lighting without any professional equipment is by standing in front of a window about 4 feet away. Make sure you're facing towards the window so that the light fills in your face (and be sure the sun isn't shining directly on you).
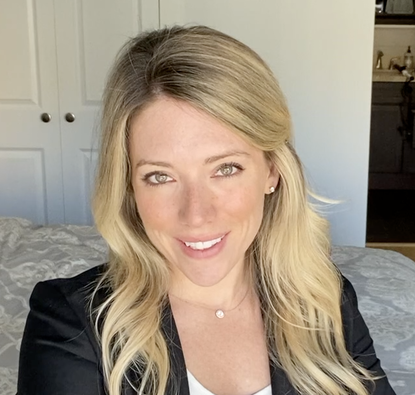
Here's an example where all lights were turned off in the room except the light coming from the window:
The window is right behind the camera, and all that soft light is coming down onto my face.
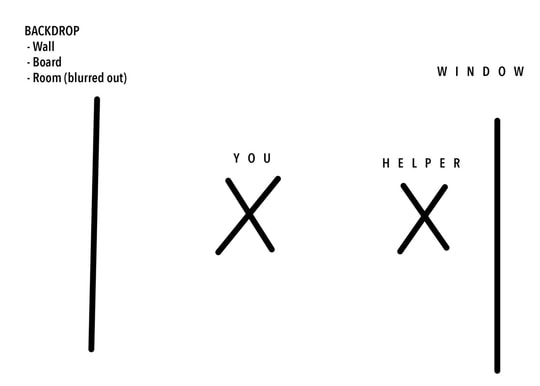
As a reminder, here's the setup and a diagram to reference:
The "Take Your Own Headshot" Toolkit
5 Great Headshot Apps PLUS a Video Tutorial
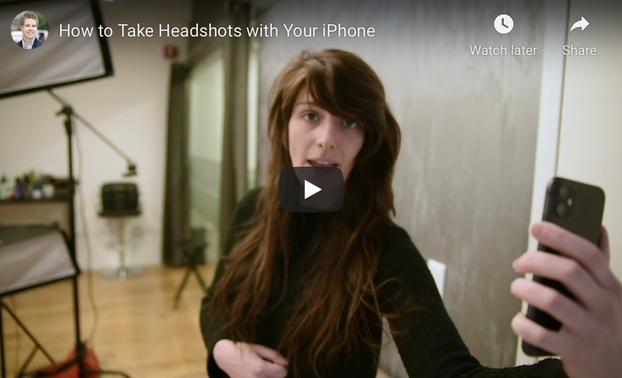
We've compiled a list of our 5 favorite apps to help you take a great headshot, plus created a short video tutorial with one of our expert studio photographers to show you exactly how to take your own professional headshot.
Here's what's included:
Here's what's included:
|
Part 2 of 3
"How You Look"
In the photo with the blue cardigan, my shirt collar is sticking out on one side, and not on the other. This is something that could have been fixed during the shoot.
While shooting, make sure to pay attention to:
While shooting, make sure to pay attention to:
- Posture: Stand up tall. If you think you look hunched, it could simply be the curvature of your spine. Try pointing your body at a slight different angle (like instead of turning left, turn to the right). This usually helps fix posture issues if standing taller doesn't seem to help.
- Clothing: Try to wear solid colors if possible, and make sure you're shirt isn't wrinkled! You can also read this great article on what to wear for headshots.
- Glare in glasses: A trick to fix glare is to angle your lenses down a bit. Basically you can raise the back part of the glasses off your ears so the lenses are tilted down. It shouldn't be noticeable in the camera but works really well!
- No flash: Make sure the camera flash is OFF or it will make you look shiny and unnatural in the picture.
- If you have a double chin, try doing "The Turtle": Push your forehead towards the camera by about an inch to help make your jawline sharper. Don't push too far or it will look weird... just do it a little bit.
Part 3 of 3
"Your Expression"
If your smile is fake, you won't connect with the viewer and it could create distrust!
So how do you get a real smile in your shot? Well, just look at the camera and start laughing!
So how do you get a real smile in your shot? Well, just look at the camera and start laughing!
The simplest way to get a great expression, whether it's a big, open-mouthed smile or a subtle, closed-mouth expression, is to actually FEEL genuine.
You must feel good in the photo and imagine warmly greeting someone.
When you FEEL what you're projecting, it shows in ways that faking it never will.
3 Numbers All Actors Should Know
Knowing how to get great headshots is important, but it's just one small part of growing your acting career.
If your goal is to act full-time, you should know these 3 numbers:
If your numbers aren't there yet, that's OK! It's certainly not easy to audition and book that much.
But those are actual, real numbers from busy, working actors who didn't just get lucky.
Those busy, working actors started at the beginning – for them, the biggest question swirling in their minds at the time was:
How do I get taken seriously by casting directors when I don't have good credits or footage? And how do I get credits/footage without being taken seriously by casting directors?
It's the classic actor's catch 22.
When we're struggling to get our careers off the ground, our minds can slip into "desperation mode" and start looking for quick-fix solutions. We'll ask ourselves questions like:
But questions like those mean you're focused on Tactics, instead of Strategy.
Think about it this way: Would you bake a cake by randomly sliding a pile of flour, eggs, and chocolate into the oven? Of course not! How you combine the ingredients, the temperature you cook it at, and for how long are all just as important.
Similarly, the long-term, well thought-out strategy you follow as you grow your acting career matters. A LOT.
That's why "strategic thinking" is one of the greatest gifts you can give yourself as an actor.
So today I'd like to give you a gift: 3 tools specifically designed to help you start thinking and operating strategically.
These tools have helped over 14,000 actors so far, many of whom have gone on to:
My free Actor's Toolkit will help you BLAST through the actor's catch 22 so you start getting WAY more auditions and bookings every month:
If your goal is to act full-time, you should know these 3 numbers:
- 40-60 Submissions – This is how often full-time, working actors submit themselves (whether they have an agent or not) each month.
- 10-20 Auditions – This is how many times full-time working actors audition (or at least record and submit self-tapes) each month.
- 3-5 Bookings – This is how often full-time working actors book real, paid acting jobs each and every month.
If your numbers aren't there yet, that's OK! It's certainly not easy to audition and book that much.
But those are actual, real numbers from busy, working actors who didn't just get lucky.
Those busy, working actors started at the beginning – for them, the biggest question swirling in their minds at the time was:
How do I get taken seriously by casting directors when I don't have good credits or footage? And how do I get credits/footage without being taken seriously by casting directors?
It's the classic actor's catch 22.
When we're struggling to get our careers off the ground, our minds can slip into "desperation mode" and start looking for quick-fix solutions. We'll ask ourselves questions like:
- "Should I take another acting class?"
- "Do I need better headshots or should I pay to shoot a reel?"
- "What's the fastest way to get an agent?"
But questions like those mean you're focused on Tactics, instead of Strategy.
Think about it this way: Would you bake a cake by randomly sliding a pile of flour, eggs, and chocolate into the oven? Of course not! How you combine the ingredients, the temperature you cook it at, and for how long are all just as important.
Similarly, the long-term, well thought-out strategy you follow as you grow your acting career matters. A LOT.
That's why "strategic thinking" is one of the greatest gifts you can give yourself as an actor.
So today I'd like to give you a gift: 3 tools specifically designed to help you start thinking and operating strategically.
These tools have helped over 14,000 actors so far, many of whom have gone on to:
- Book Broadway roles
- Land network television and Netflix shows
- Sign with agents and managers
- And much more – faster than you'd expect (you can see some success stories here).
My free Actor's Toolkit will help you BLAST through the actor's catch 22 so you start getting WAY more auditions and bookings every month:
| The Actor's Toolkit:
|
| Martin Bentsen (author of this guide) is an actor marketing coach who uses strategic thinking to help actors book more work. He’s helped over 14,000 actors with their careers and actor headshots since 2009 and his photography studio City Headshots is ranked #1 on Yelp. He’s spoken at NYU, The New England Theater Conference, The Actor’s Green Room, and other venues. Want to book more acting work by thinking strategically? Start with his free Actor’s Toolkit to create new opportunities right away, or visit his website at www.martinbentsen.com. |
Sign Up for a "Virtual Headshot" Package
If you want a professional photo and don't want to have to travel to a professional studio, we can shoot your headshots while you're at home!
One of our expert photographers will take your photos through Zoom, guiding you through the process, step by step.
To learn more about our Virtual Headshot service (including pricing), click here.
One of our expert photographers will take your photos through Zoom, guiding you through the process, step by step.
To learn more about our Virtual Headshot service (including pricing), click here.
Further Reading:
If you enjoyed this article, here are three pages I think you'll find helpful:
Brenda Salazar
2/26/2021 09:44:06 am
I like taking pictures of myself with a cellphone.
Martin
2/26/2021 11:04:46 am
Don't we all!
Comments are closed.

